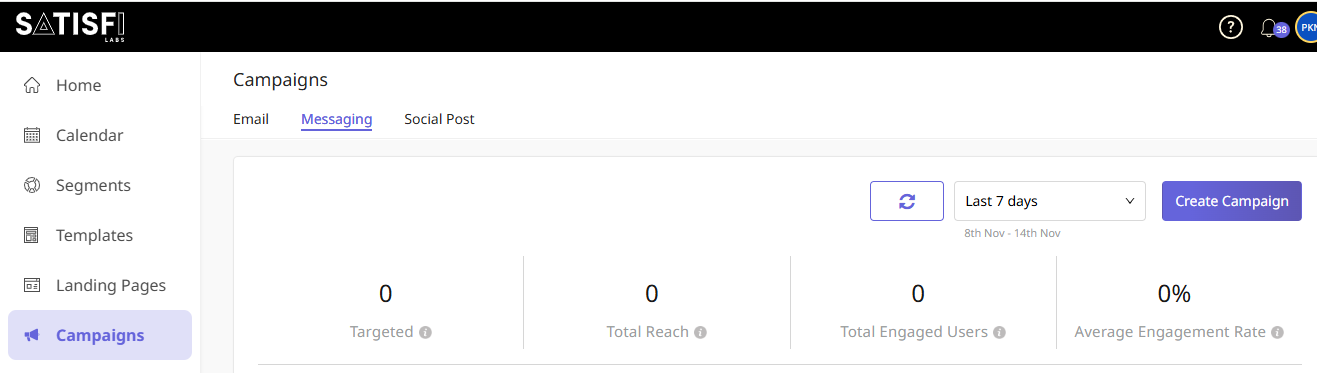
To create messaging campaign with Factoreal, perform the following steps:
Navigate to Campaigns → Select Messaging → Click on Create Campaign
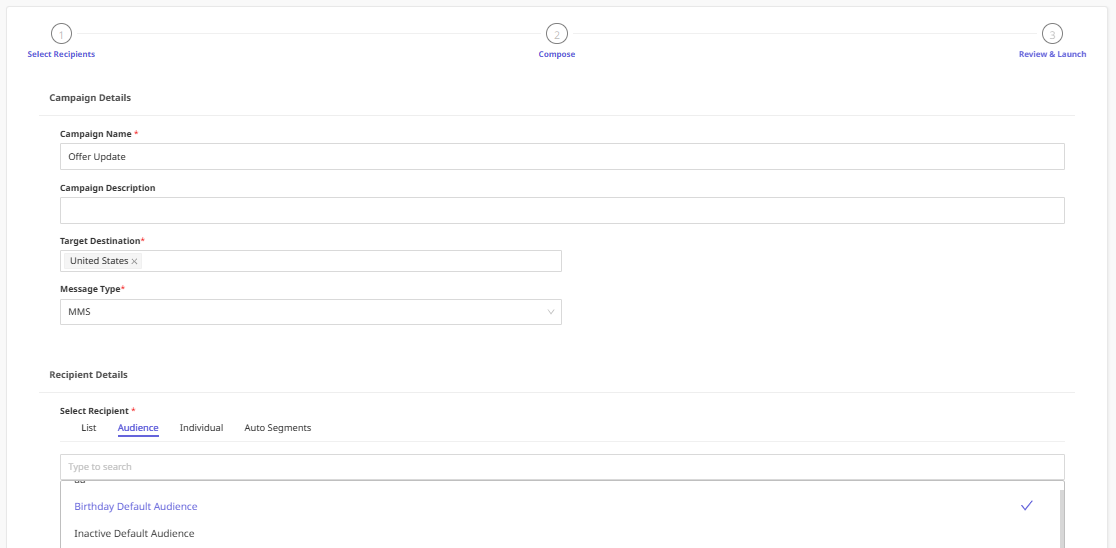
Enter all the required fields, including campaign name, description (optional), message type
To send an MMS, select MMS from the Message Type dropdown. For SMS, choose SMS instead.
Choose recipients for this campaign from a List, Audience or Individual contact (you can choose multiple lists, audiences and contacts).
Note: Recipients who have given consent can only be targeted in USA or Canada.
Once done, click Next to proceed.
If you have not selected India as a target destination –
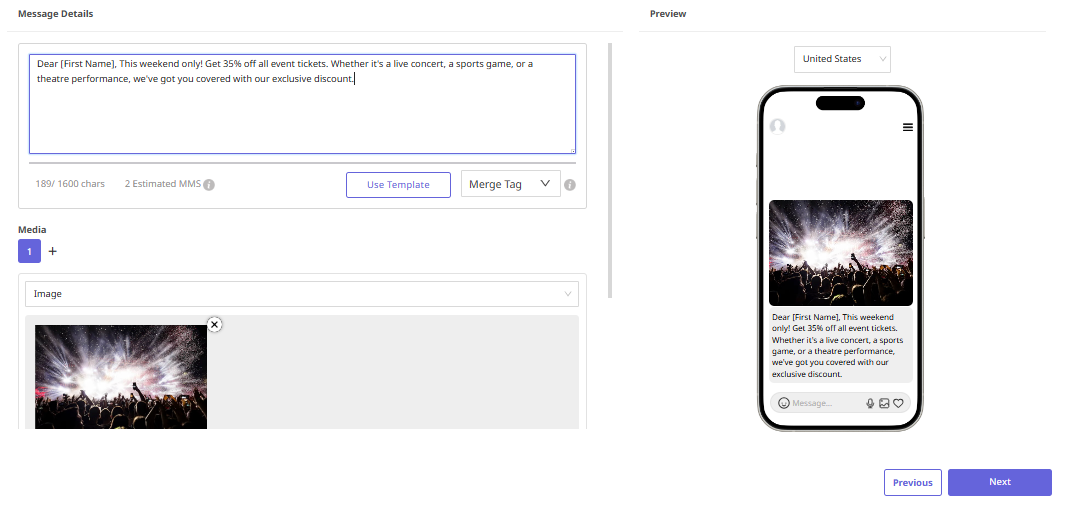
a) Choose between Composing Text or Use template.
b) If you choose “Use template” select one of the available templates.
c) The templates will be filtered to show either SMS templates or MMS templates, depending on the message type chosen in the previous step.
d) If you have selected MMS as the message type, you will have the option to upload media files.
e) Organization prefix allows the branding prefix configured in SMS settings to be prefixed to the outgoing text.
f) Opt-Out Language can be enabled or disabled using the slider. If enabled, it will insert the respective destination’s opt-out suffix in the text. This will be specific to each country as saved in the SMS settings.
g) Shorten URL option can be enabled or disabled using the slider. Enable this option to shorten your long URLs and make their clicks trackable.
If you have selected India as a target destination –
a) For India, you have to get the message approved from DLT portal beforehand and save the message as a template and only then can you send the message to your recipients. So, you cannot use Compose option.
b) If you choose Use a template select one of the available templates.
c) Organization prefix & Opt-Out Language is not applicable for India.
d) Shorten URL option can be enabled or disabled using the slider. Enable this option to shorten your long URLs and make their clicks trackable.
Note: MMS is supported only in United States
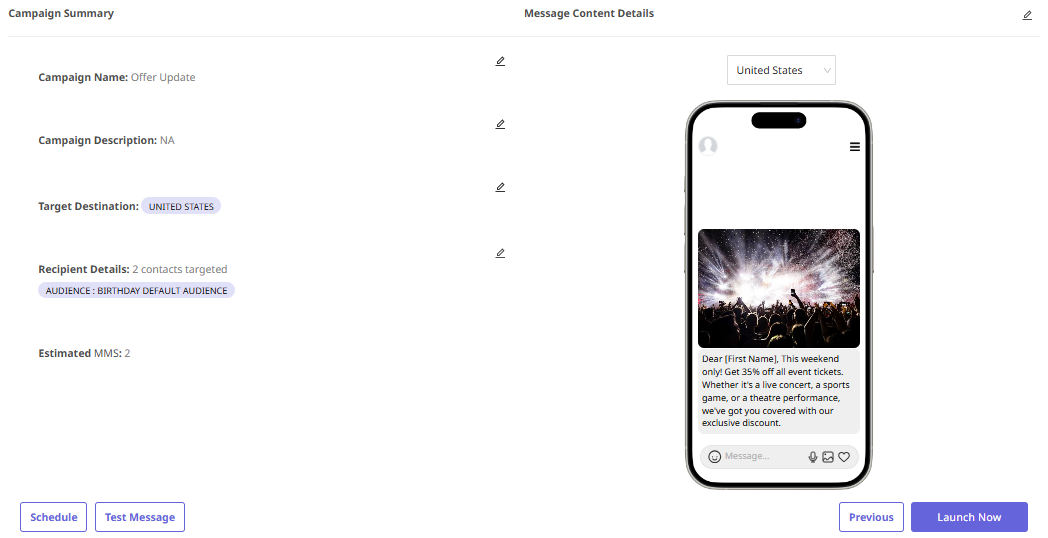
Click Next to proceed to the Campaign Summary page. Here, you can review your campaign details and make any necessary changes.
To test your campaign, you can send test message to a registered number by clicking “Test Message”.
Choose how you want to proceed:
Schedule: Set a future date and time to send the campaign.
Launch Now: Send the campaign immediately.
For a simple overview, refer to [How to Create an SMS/MMS Template].